Creating Groups and Grouping
4. Auto-Create Groups
The Auto-create groups function quickly assigns your students to multiple groups and includes the option to randomize group membership.
To use Auto-create groups:
Step 1: On the groups page, click Auto-create groups. The Auto-create groups page will open.
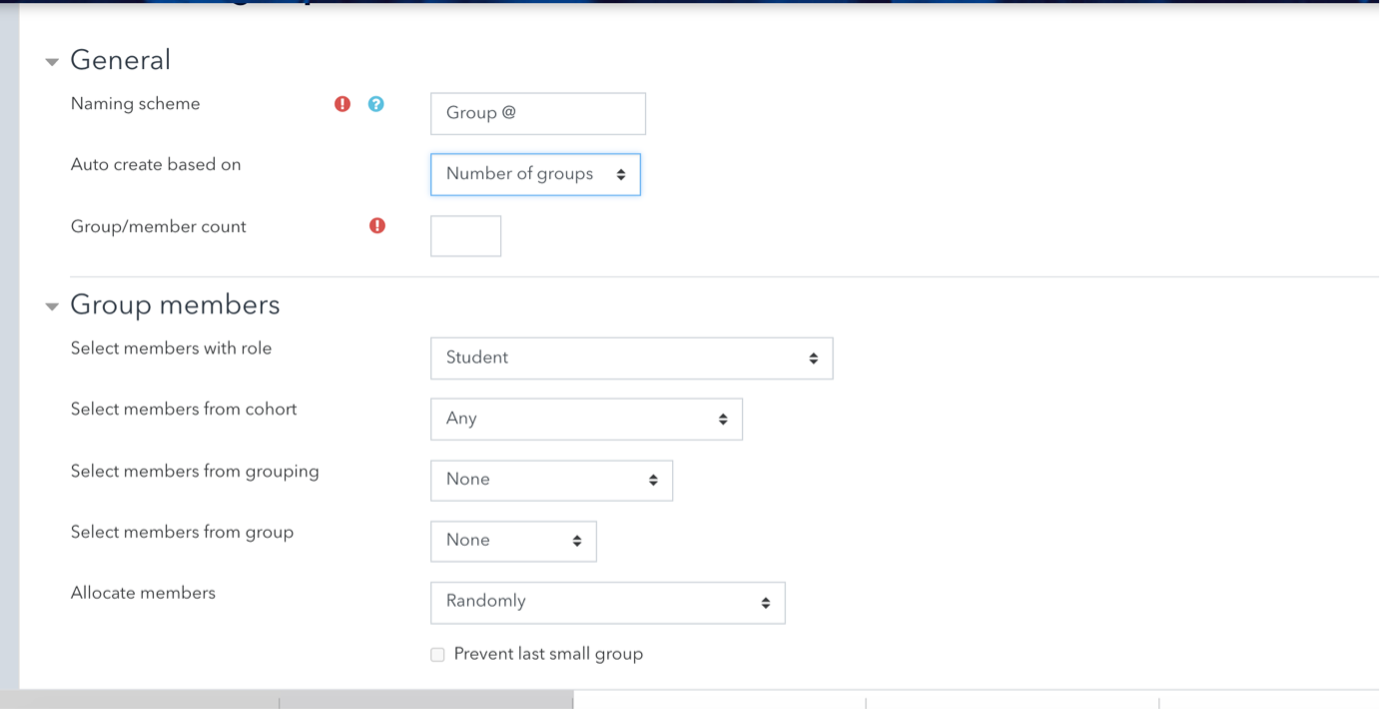
Step 2: For Naming scheme, enter the group name you would like to use for your groups. Moodle will automatically generate names based on what you enter.
o An "@" sign will generate a letter (e.g., "Group @" will generate Group A, Group B, Group C)
o A "#" sign will generate a number (e.g., "Group #" will generate Group 1, Group 2, Group 3)
Step 3: From the Auto create based on drop-down menu, choose how you want to divide your students:
o Number of groups will form groups based on the total number of groups you select
o Members per group will form groups based on the number of members you want in a group
o Use student names can be used if you are creating groups of one.
Note: If you select Members per group, under the Group members settings, check Prevent last small group. If a remaining group is less than the size you set, Moodle will place these members into other groups (preventing a group of 1 student).
Step 4: For Group/member count(required), enter the number of members you would like in each group (If creating a group based on Course member names, enter 1).
Step 5: Under the Group members settings, from the Select members with role drop-down menu, choose whether to include only students or course members with other roles.
Step 6: From the Allocate members drop-down menu, select how you want group members to be assigned to groups. The default setting is Randomly. You can also sort alphabetically by First name, Last name, or ID number.
Step 7: (Optional) To create new groups within a Grouping (a group of groups, useful for assigning the same activity to multiple groups), under the Grouping settings, use the Grouping of auto-created groups drop-down menu. To create your groups within an existing grouping, select the name of that grouping, otherwise, select New grouping.
Step 8: Click Preview to see a preview of the groups at the bottom of the page. If you are satisfied, click Submit.