Creating Groups and Grouping
| Site: | Watt Education |
| Course: | Setting up a Moodle Course |
| Book: | Creating Groups and Grouping |
| Printed by: | Guest user |
| Date: | Saturday, 18 July 2026, 3:05 AM |
1. Create a Group
To access the Groups page:
Step 1: Click on the gear symbol in the top right of the page and click on Turn editing on.
Go down to More.
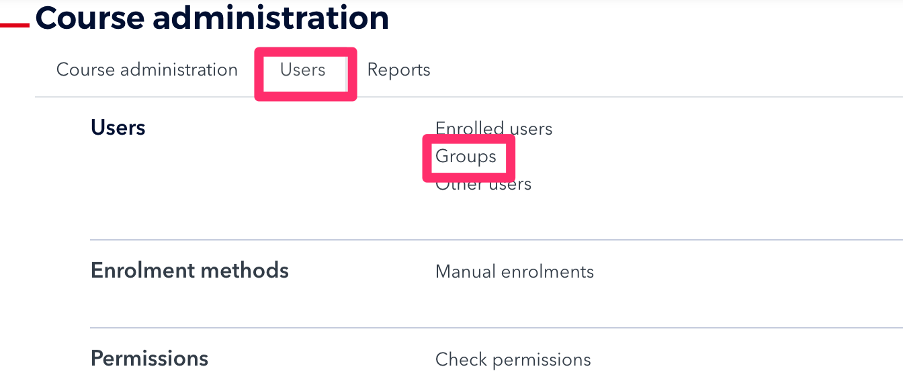
Step 2: Choose the Users tab. And choose groups.
Step 3: To create groups, you have three options:
o Create group creates a single group.
o Auto-create group lets you set parameters to automatically create multiple groups, and have Moodle assign your students to the groups.
o Import groups lets you upload a spreadsheet to create multiple empty groups.
2. Create a Single Group
Step 1: n the Groups page, click Create group. The Create group page will open.
Step 2: For Group name, enter a name (required), and for Group description, enter a description (optional).
Step 3: Click Save changes to create the group. You will be returned to the Groups page where your new Group will be listed in the left column, with (0) indicating the number of students in the group.
Step 4: To add group members, see below.
3. Add & Modify Group Members
Step 1: On the Groups page, under Groups (left column), click the group name – Fake Group. The group name will be highlighted, and the Members of... column (on the right), will list any course members who have already been added to the group.
Step 2: If at this point you want to add another group – so your class is split into A/B or you are using small groups for a project – just click on Create Group to create the new group(s)
Step 3: Below the Members of... column (at right), click Add/remove users. The Add/remove users page will open.
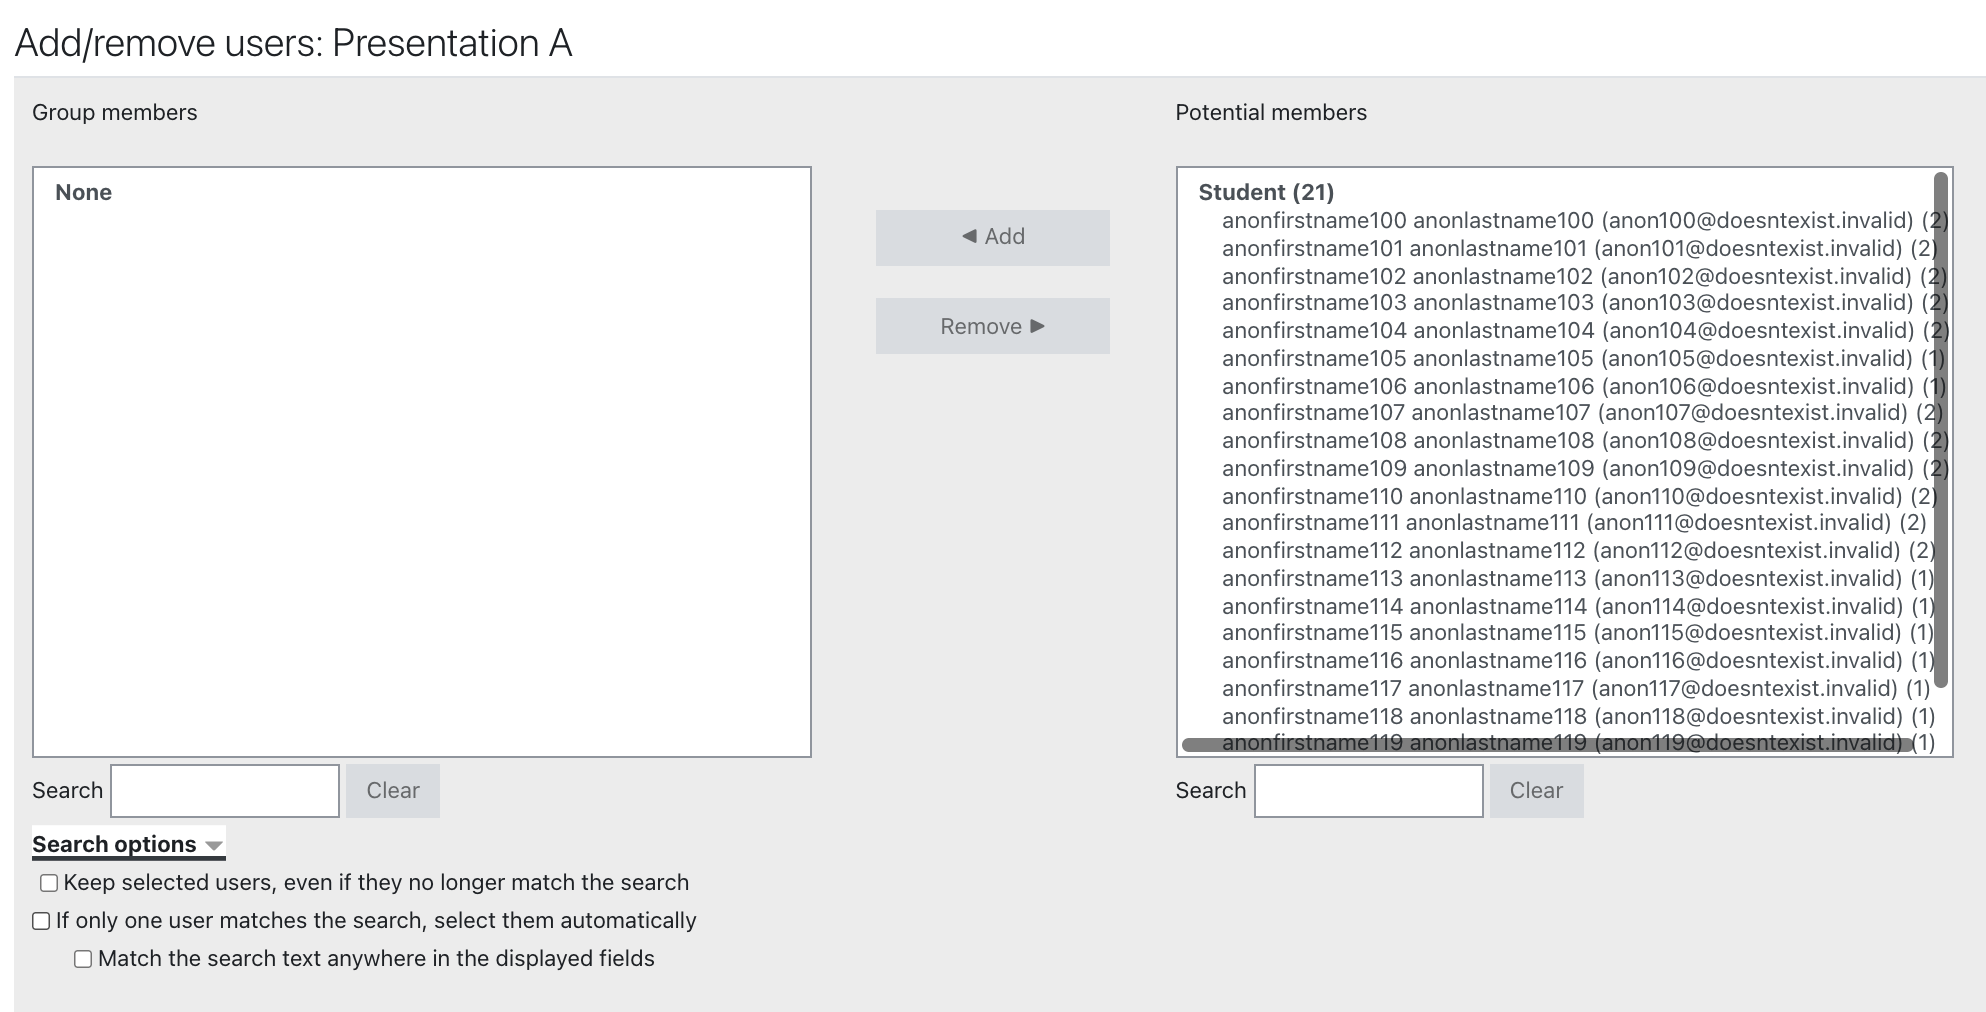
Step 5: To add students to a group:
In the Potential members column (at right), click a Student name to highlight it.
• To select multiple members, hold down the CTRL (Win) or Command (Mac)key while you click.
• If you don't see the student names you're looking for, use the search bar at the bottom of the column.
Once you've selected the names you want to add, click Add to move students into the group. The students' names will be added to the Group members list (at left) and will no longer appear on the Potential members list.
Step 6: To remove students from a group:
In the Group members column (at left), click student names, or to select multiple names, press CTRL - click (Win) or Command - click (Mac), then click Remove. The names will be removed from the group and returned to the Potential members column.
Step 7: When you are finished modifying the group members, click Back to groups.
4. Auto-Create Groups
The Auto-create groups function quickly assigns your students to multiple groups and includes the option to randomize group membership.
To use Auto-create groups:
Step 1: On the groups page, click Auto-create groups. The Auto-create groups page will open.
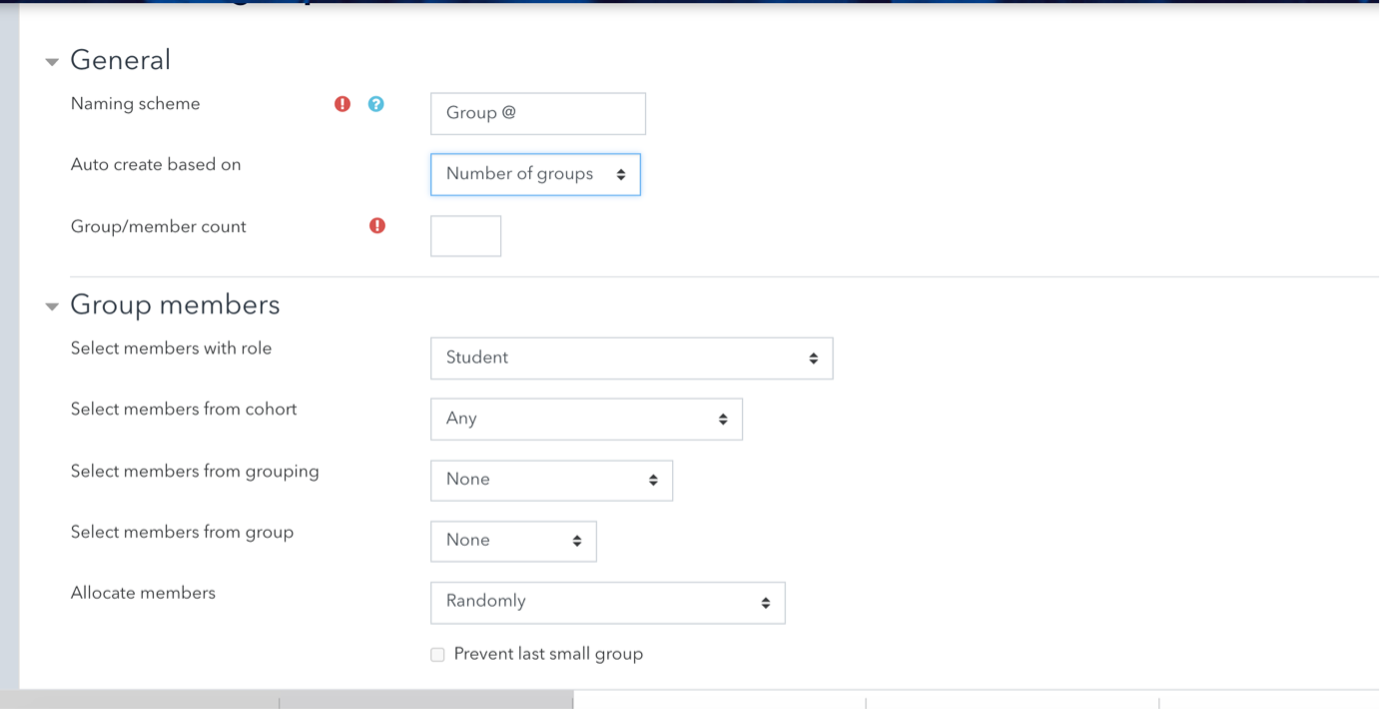
Step 2: For Naming scheme, enter the group name you would like to use for your groups. Moodle will automatically generate names based on what you enter.
o An "@" sign will generate a letter (e.g., "Group @" will generate Group A, Group B, Group C)
o A "#" sign will generate a number (e.g., "Group #" will generate Group 1, Group 2, Group 3)
Step 3: From the Auto create based on drop-down menu, choose how you want to divide your students:
o Number of groups will form groups based on the total number of groups you select
o Members per group will form groups based on the number of members you want in a group
o Use student names can be used if you are creating groups of one.
Note: If you select Members per group, under the Group members settings, check Prevent last small group. If a remaining group is less than the size you set, Moodle will place these members into other groups (preventing a group of 1 student).
Step 4: For Group/member count(required), enter the number of members you would like in each group (If creating a group based on Course member names, enter 1).
Step 5: Under the Group members settings, from the Select members with role drop-down menu, choose whether to include only students or course members with other roles.
Step 6: From the Allocate members drop-down menu, select how you want group members to be assigned to groups. The default setting is Randomly. You can also sort alphabetically by First name, Last name, or ID number.
Step 7: (Optional) To create new groups within a Grouping (a group of groups, useful for assigning the same activity to multiple groups), under the Grouping settings, use the Grouping of auto-created groups drop-down menu. To create your groups within an existing grouping, select the name of that grouping, otherwise, select New grouping.
Step 8: Click Preview to see a preview of the groups at the bottom of the page. If you are satisfied, click Submit.
5. Import Empty Groups
Import groups allows you to create multiple groups at once by uploading a spreadsheet containing the names of the groups. While this can create multiple groups at once, all groups will be empty and you will need to manually add users. Alternatives:
- To create multiple groups and have Moodle automatically assign group members, refer to Auto-Create Groups (above).
- To import multiple
groups already populated with students, see Upload
or Download Groups From Moodle.
5.1. Prepare a List of Groups for Import
Before you can import groups, you must first prepare a text file containing a list of groups that you want to create. The group list has required fields needed in order for the import to be successful. The file must include "groupname" as a field, and can optionally include "description". The following steps explain this process using Microsoft Excel.
Step 1: Open Excel and create a new worksheet by clicking File > New Workbook.
Step 2: In cell A1 enter "groupname" (case sensitive).
Step 3: Optional: In cell B1 enter "description" (case sensitive).
Step 4: In the rows that follow, enter names and descriptions for each of the groups (descriptions should be short with no commas).
Step 5: To save your file, click File > Save As. In the Format drop-down menu, change the file format to Comma Separated Values (.csv). Enter a name for your file, then click Save.
5.2. Create Groups through Import
Step 1: On the Groups page, click Import groups. The Import groups page will open.
Step 2: Click Choose a file. The File Picker pop-up window will open.
Step 3: In the File Picker pop-up window, click Upload a file. Then, click Choose File to select the CSV file from your computer. Once you select the file, the name will appear next to the Attachment box. Click Upload this file. The File Picker pop-up window will close, and you will see the file listed on the Import groups page.
Step 4: Click Import groups. The import process will begin, and a confirmation page will open.
Step 5: If your import is not successful, check your CSV file and ensure that the column headings are correct. Also, if you included groups descriptions, considering shortening them and removing any commas.