Adding Resources to Moodle
6. Add a Moodle Folder and Upload Files using the File Picker
Alternatively, you can use the File picker to browse for files on your computer.
Note: The easiest way to upload multiple files with the File picker is to first make them into a .zip file, then unzip the file in Moodle.
Step 1: Under the Content heading, click Add...( ) at top left of the Files area. The File picker pop-up window will open.
Step 2: Select Upload a file (left) and then select Choose file. The File picker window will open for you to search for and select the file on your computer. Select the file you would like to upload and click Open. The File picker window will close, and the name of your file will appear next to the Choose file button.
Step 3: Select Upload this file. The File picker window will close, and the file will be listed in the Files area.
Step 4: If you have uploaded a .zip file to your folder, the next step is to unzip it. In the Files area, select the zip file icon. A pop-up window for the file will open. Click Unzip (at top). The pop-up window will close, and the original files will appear along with the .zip file in the Files area.
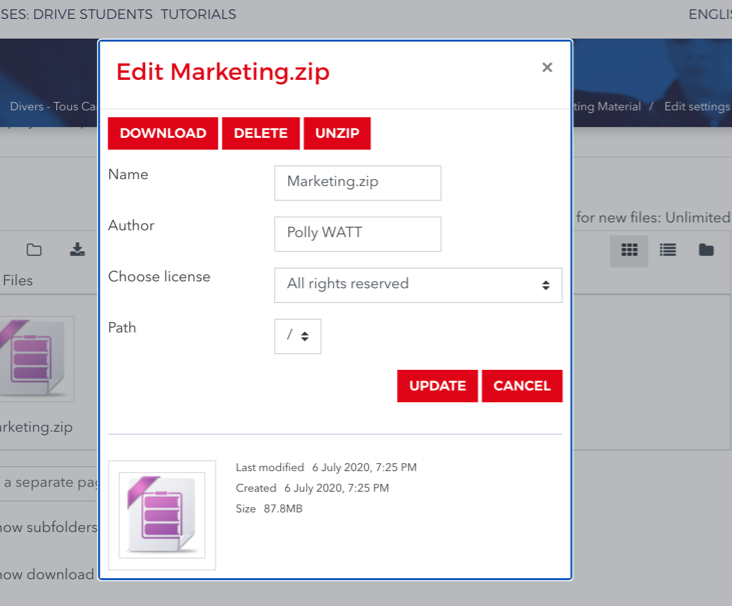
Step 5: (Optional) You can delete the zip file or leave it in the folder to allow students to download all the files at once to unzip on their own computers. To delete it, click the .zip file icon again and then click Delete (at top) in the pop-up window. Click OK to confirm the deletion. The pop-up window will close and the .zip file will be removed.
Step 6: To select how folder contents should display from the Display folder contents drop-down menu, choose: On a separate page or Inline on a course page.
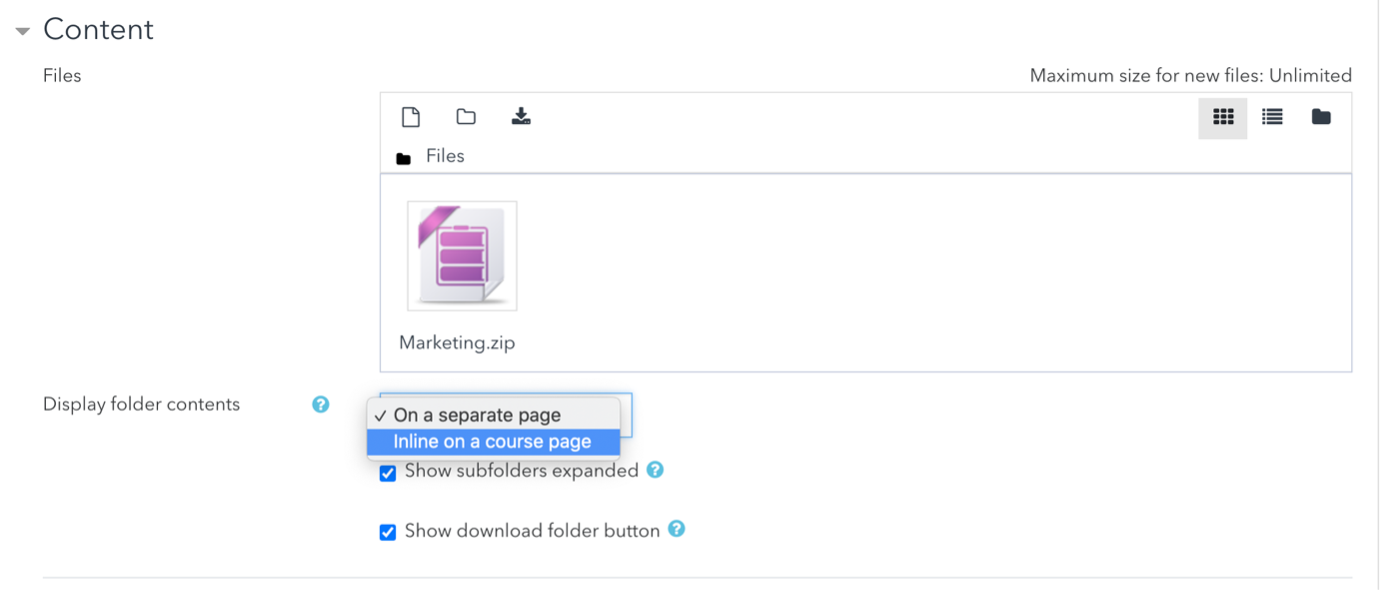
If you choose to display the folder contents on a course page, the description will be displayed only if "Display description on course page" is checked. Also note that when a folder is displayed on the course page, participants' view actions cannot be logged.
Step 7: To have subfolders expanded by default, select the check box for Show subfolders expanded.
Step 8: To allow students to download the entire contents of a folder as a .zip file, select the Show download folder button.
Step 9: Click Save and return to course
(at-bottom) to complete the file upload process. The Folder will appear in the
Section to which it was added with a folder icon ( ).
).
Step 10: To open the Folder, select the Folder name. Once open, a Folder shows a directory of files. To download files, students click a file name, or if set up as in Step 8: above, students can click the Download Folder to download the folder contents as a .zip file.