How to Create a Moodle Quiz: Step-by-Step Guide
| Site: | Watt Education |
| Course: | Setting up a Moodle Course |
| Book: | How to Create a Moodle Quiz: Step-by-Step Guide |
| Printed by: | Guest user |
| Date: | Saturday, 18 July 2026, 1:06 AM |
Description
Quizzes work in 2 parts. You need to set up the quiz first and then add the questions. You can create the questions before directly into the question bank and add them to your quiz.
Or you can create them at the end of setting up your quiz. They will be saved into your question bank so you can use them for another time.
Table of contents
- 1. Adding and Setting Up a Quiz
- 2. The Basic Settings
- 3. Setting #2: Grade. Set a Passing Grade (Optional)
- 4. Setting #3: Layout. Build a Structure
- 5. Setting #4: Question Behavior. Shuffle Answers
- 6. Settings #6 & #7
- 7. Setting #8: Overall Feedback. Provide a Final Comment
- 8. Setting #9: Common module settings
- 9. Setting #10: Restrict access
- 10. Setting #11: Activity completion
- 11. Settings #12 & #13
- 12. Step 6: Click Save and Display
- 13. Step 7:
1. Adding and Setting Up a Quiz
Step 1: Turn Editing on
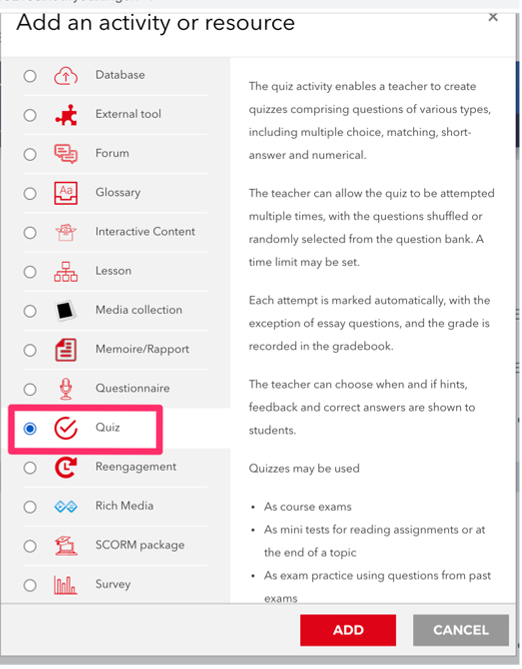
Step 2: Go to the topic shell and click on Add an activity or resource, in the bottom right corner.
Step 3: Choose Quiz in the Activities section click Add.
Step 4: Enter the quiz name and its description. It’s also important to set a number of options so that students don’t cheat.
2. The Basic Settings
Setting #1: Timing. Protect from Cheating
By default, learners have unlimited time to pass the quiz; they can get started today and finish in three days with the highest score by copying the answers from the textbook.
To obtain credible results, we’ll set an assessment period and time limit.
Assessment period
This test will automatically open on September 30 at 9.10. Until that time, learners will see only the exam description in their account.
The end date is September 30 at 10.30; at this time the quiz will be closed. If a user fails to take the test in time, he or she will automatically fail.
In this example the test is probably taking place within a lesson.
Time limit
This totally depends on the type of exercise that you are doing. For simple QCM or gap-fill exercise 20 - 30 seconds per question is enough. When the students start answering questions, they see a countdown timer that shows how much time is left. When the time expires, the quiz is automatically closed.
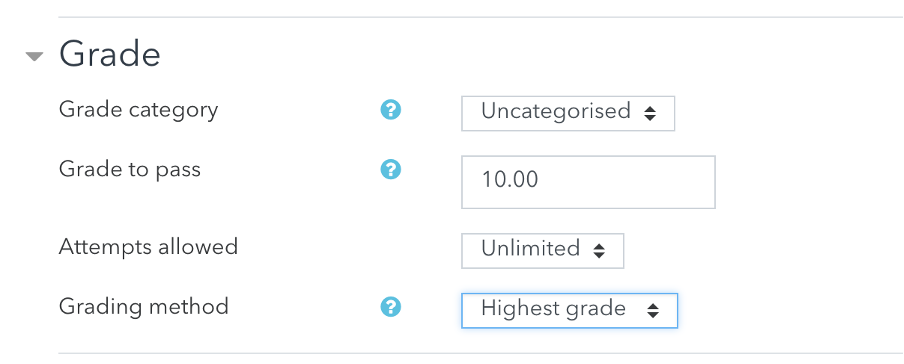
Setting #2: Grade. Set a Passing Grade (Optional)
With the default settings, students have an unlimited number of attempts to answer the same question. As a result, a quiz can be passed by a random choice method: they make a mistake and immediately change the answer, and so on until they pass. If you prefer learners not to play guessing games, limit the number of attempts and set a passing score.

Passing grade
This is the minimum score required to pass a quiz. The pass grades are highlighted in green, and fail grades in red.
Number of attempts
If this is a final exam, you can give just one attempt, and unlimited for a practice quiz.
Grading method
If this is a practice, students get to keep the highest grade they have achieved.
Setting #3: Layout. Build a Structure
It is a good idea to choose “every question on a new page” because each question is saved when you go to a new page/question. If there is an internet outage or issue, all the questions answered so far will be saved rather than the student needing to start again (if that is possible).

3. Setting #2: Grade. Set a Passing Grade (Optional)
With the default settings, students have an unlimited number of attempts to answer the same question. As a result, a quiz can be passed by a random choice method: they make a mistake and immediately change the answer, and so on until they pass. If you prefer learners not to play guessing games, limit the number of attempts and set a passing score.
Passing grade
This is the minimum score required to pass a quiz. The pass grades are highlighted in green, and fail grades in red.
Number of attempts
If this is a final exam, you can give just one attempt, and unlimited for a practice quiz.
Grading method
If this is a practice, students get to keep the highest grade they have achieved.
4. Setting #3: Layout. Build a Structure
It is a good idea to choose “every question on a new page” because each question is saved when you go to a new page/question. If there is an internet outage or issue, all the questions answered so far will be saved rather than the student needing to start again (if that is possible).
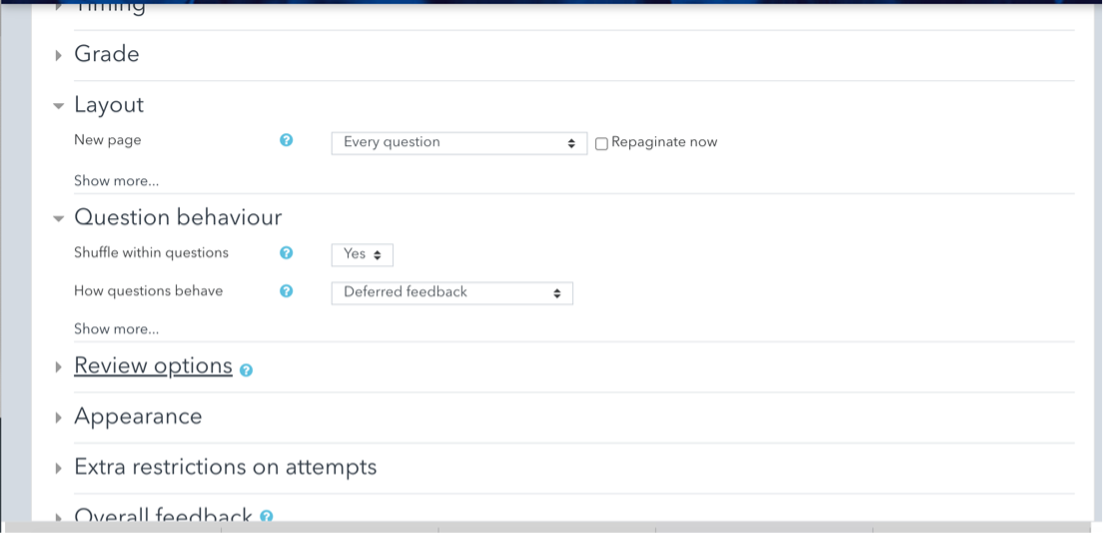
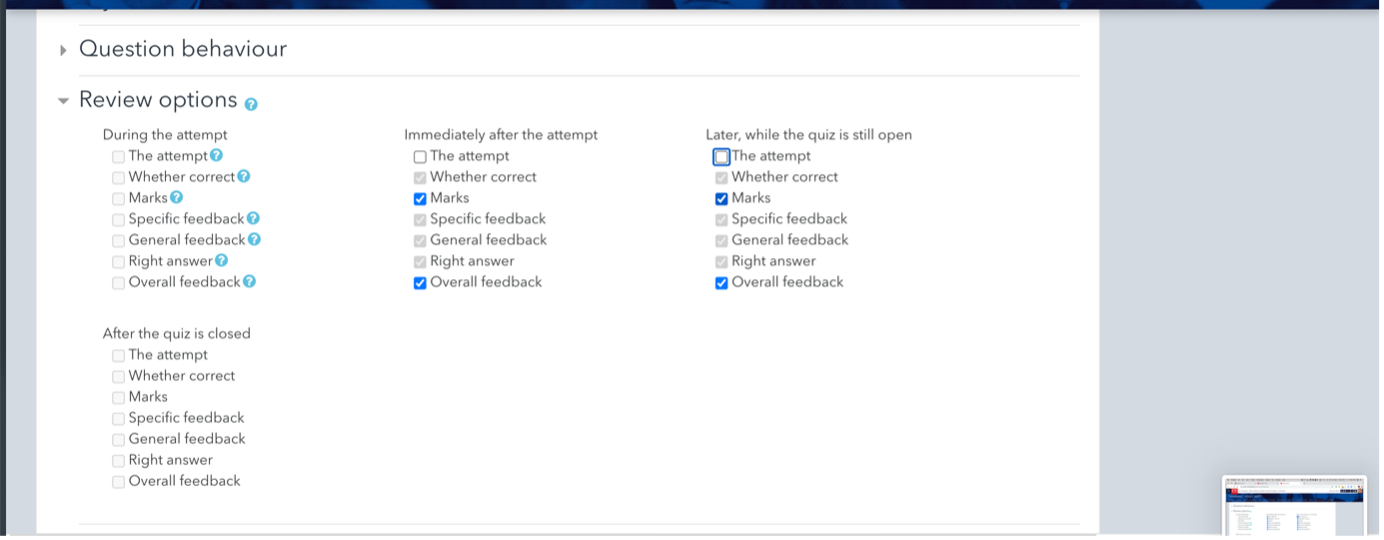
5. Setting #4: Question Behavior. Shuffle Answers
The standard options are with all the tick boxes checked in "Immediately after the attempt” and “Later, while the quiz is still open”. This will give the students their feedback immediately after the quiz.
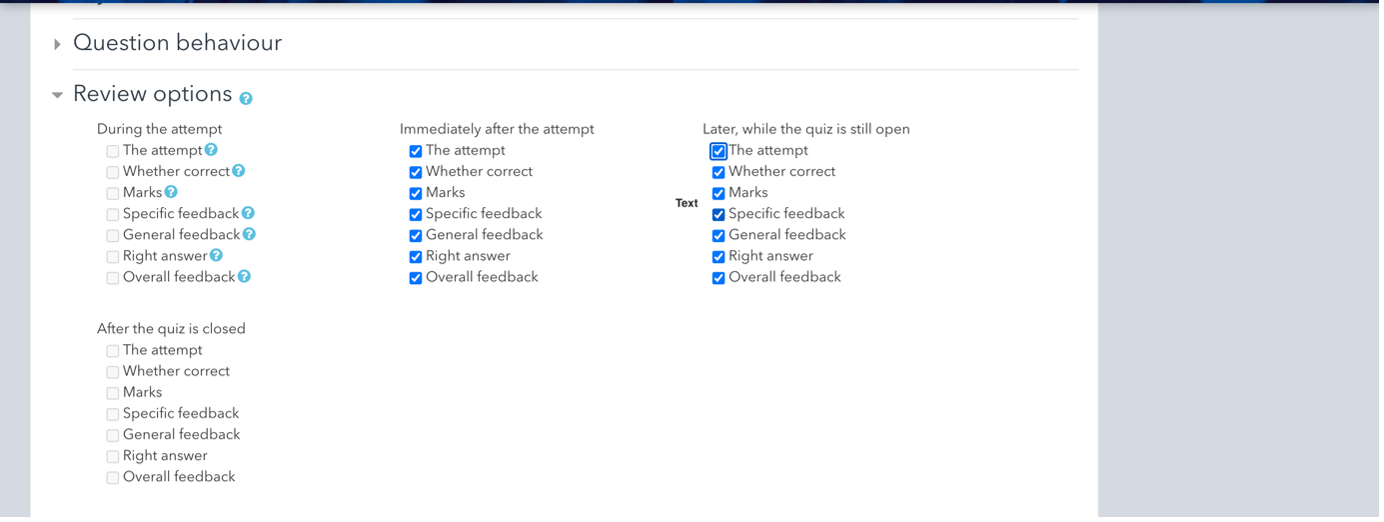
In an exam situation you will need to uncheck the top box “The attempt" in these two categories which will automatically uncheck the other boxes. Also useful if you don’t want the students to immediately have the answers in a test.
6. Settings #6 & #7
Setting #6: Appearance
Leave with default settings
Setting #7: Extra restriction on attempts
Leave with default settings
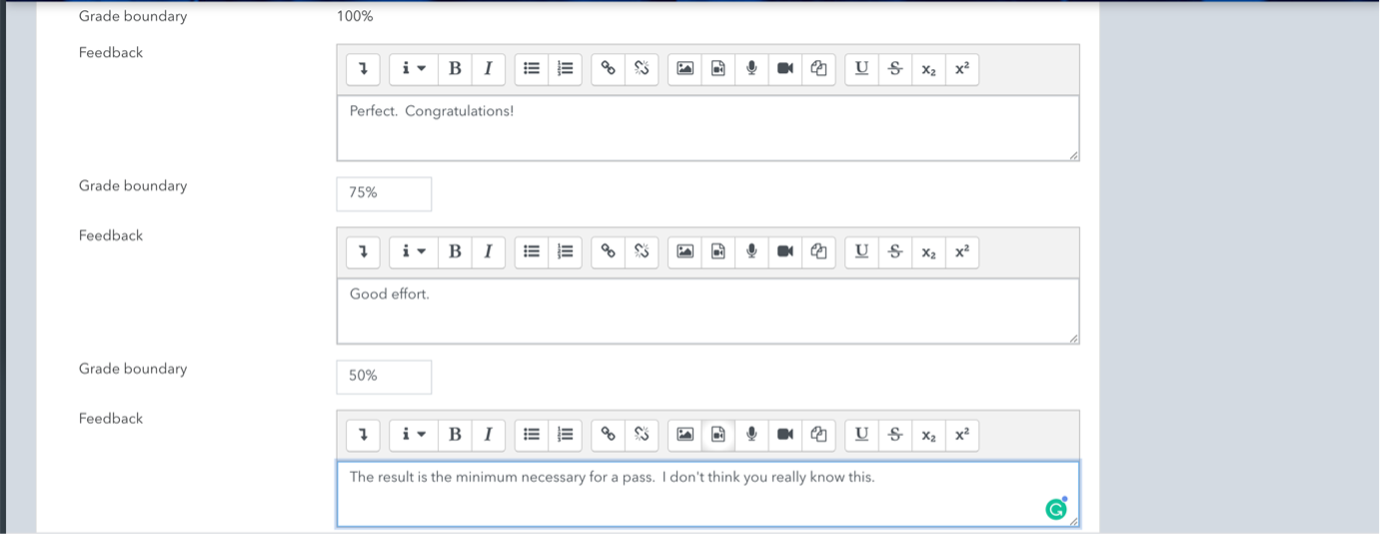
7. Setting #8: Overall Feedback. Provide a Final Comment
The overall feedback is text which users see after completing the quiz. You can show different text depending on the final score: praise high performers and tell flunkers the rules of retaking the quiz. Equally you can put no feedback.
8. Setting #9: Common module settings
If you use groups and want different groups to do different work this is where you would restrict access to a group (or several groups).
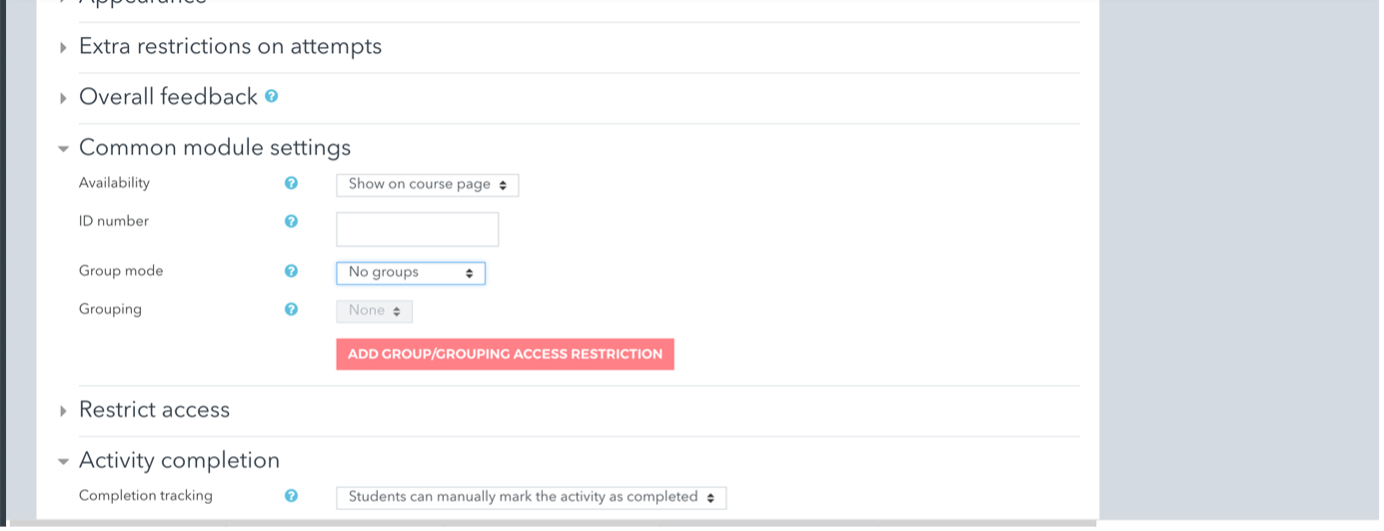
9. Setting #10: Restrict access
This allows you to set up restrictions that are fairly self-explanatory.

E.g. Activity completion - if you want students to have completed other activities before doing this quiz, this is where you would add that kind of restriction.

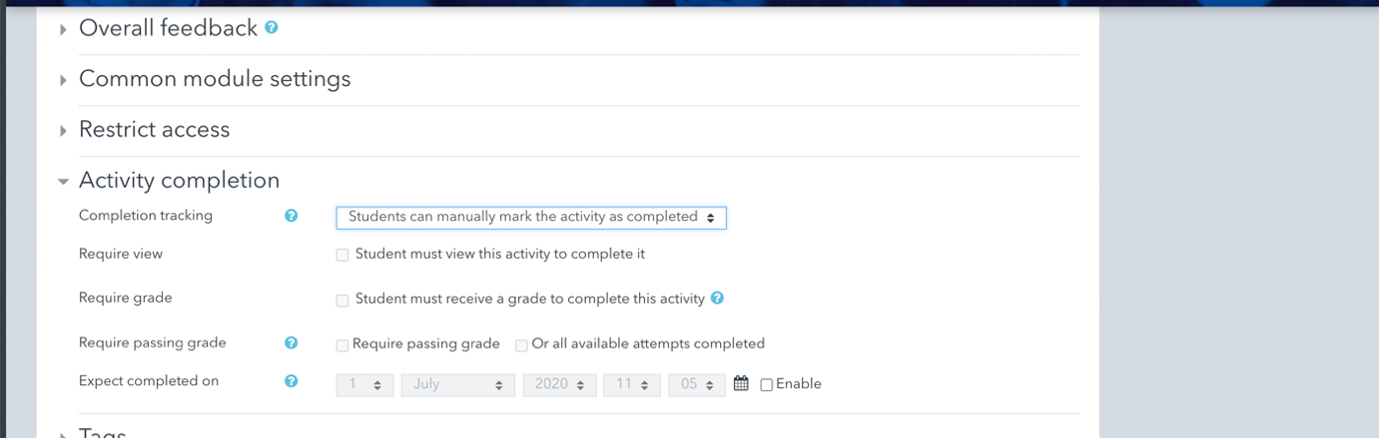
10. Setting #11: Activity completion
Activity completion allows you to set up an activity so that:
- it has to be opened
- a minimum grade has to be achieved
- by a certain date.
So, for example, grammar practice quizzes have to be completed before a lesson, where the final grammar quiz will be part of their continuous assessment.
11. Settings #12 & #13
Setting #12: Tags
Leave with default settings.
Setting #13: Competencies
Leave with default settings.
12. Step 6: Click Save and Display
The system will forward you to a new page:
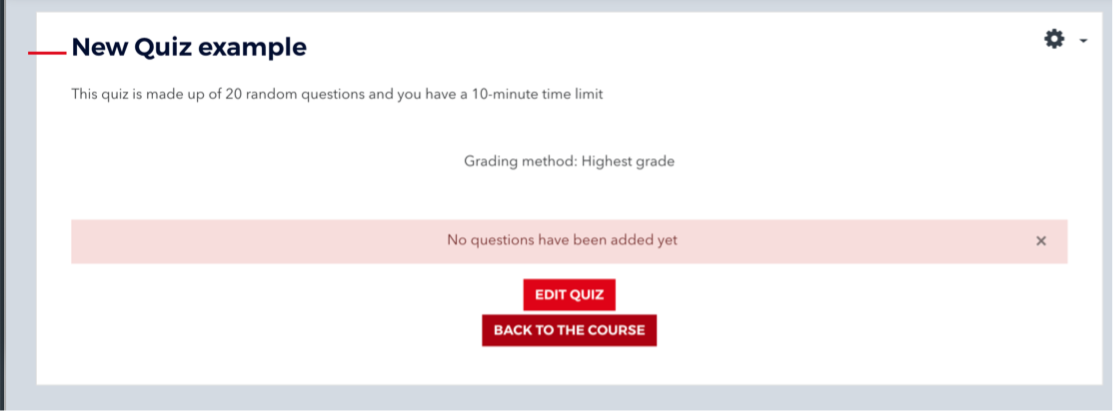
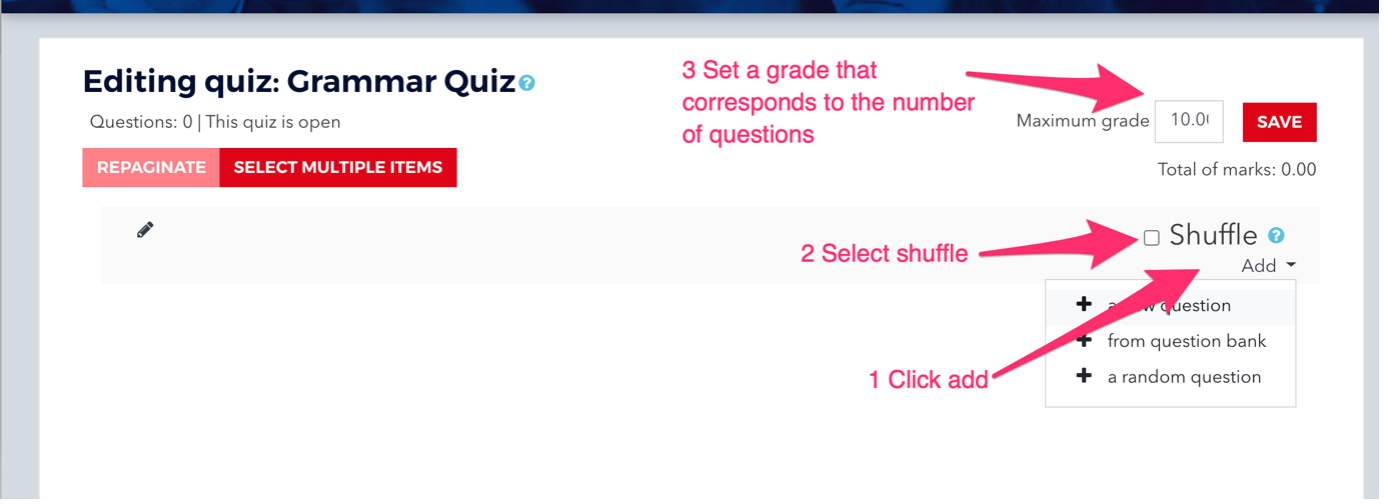
Previously, we set the minimum passing grade for the quiz (at 10). Now, you need to indicate the highest score.
13. Step 7:
Click Edit quiz and enter the mark in the Maximum grade box. The score is dependent on how many questions you want to add to your quiz and how many marks per question.