Adding Resources to Moodle
2. Add a File to Moodle
Step 1: First navigate to your course page. 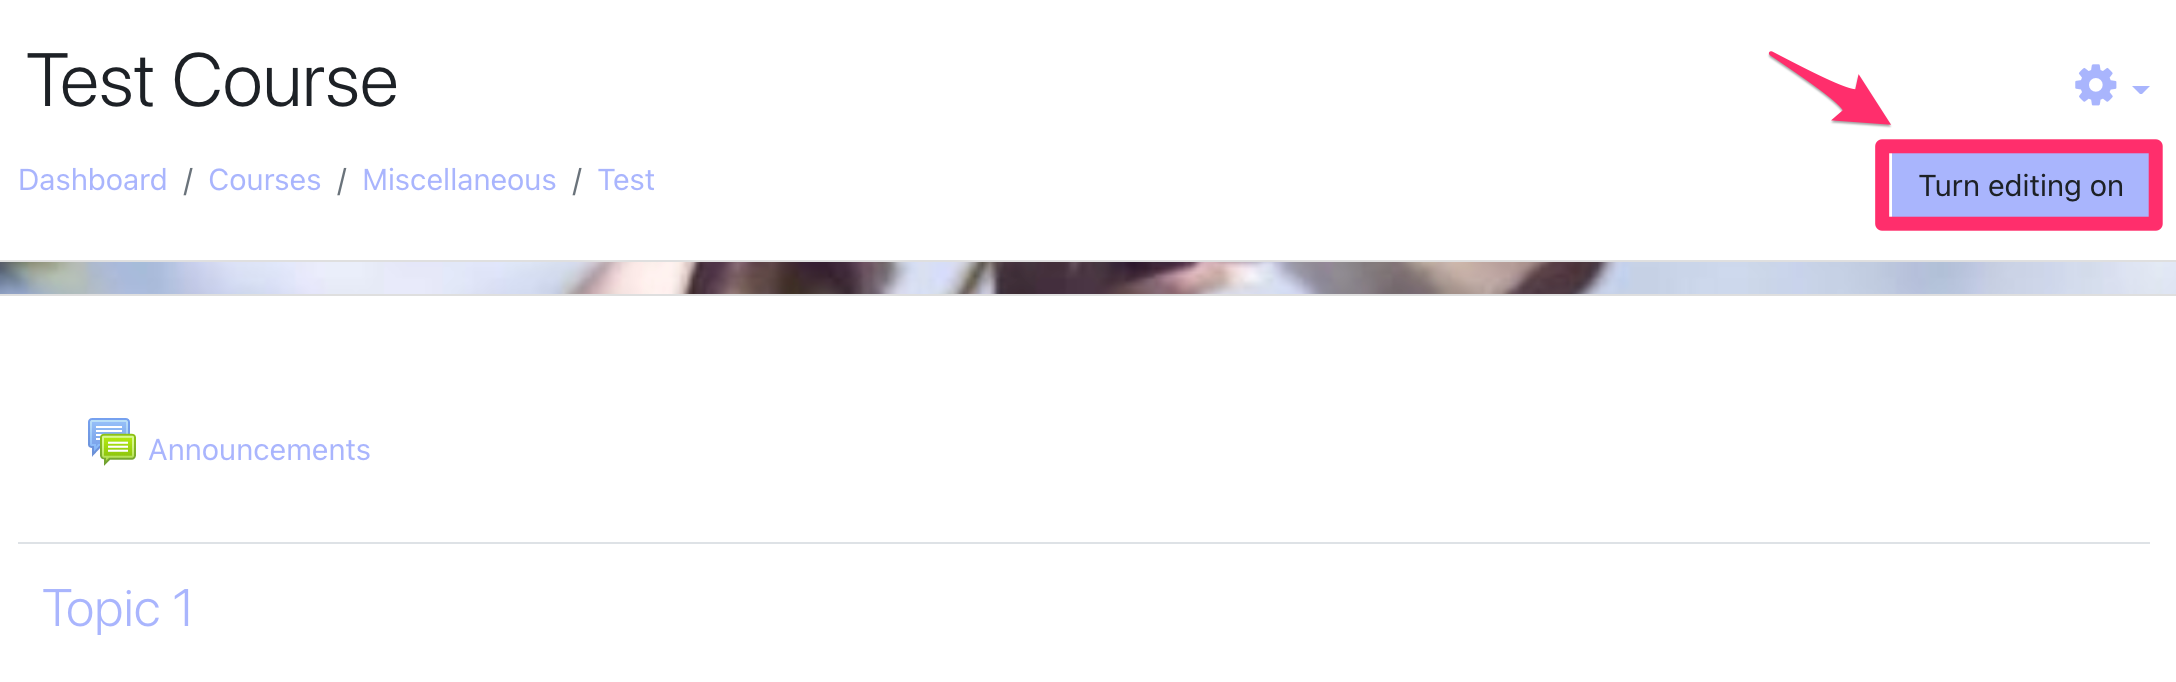
Step 2: Click on Turn editing on, at the top right of the page.

Step 3: In the Section where you want the activity to appear, click + Add an activity or resource. The Activity chooser dialogue opens.
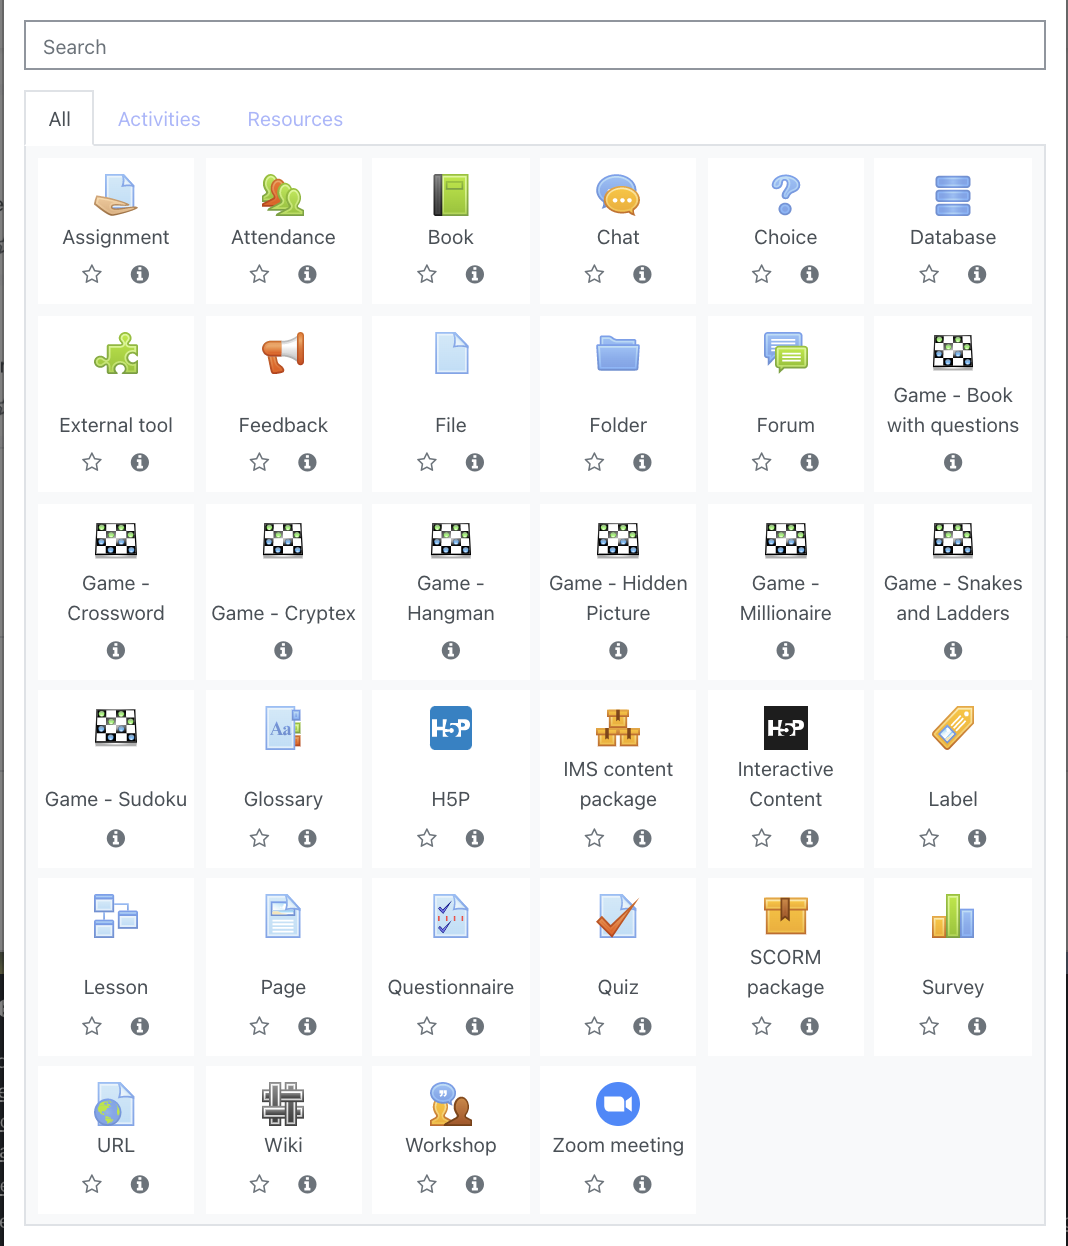
Step 4: Select an activity. The right side of the dialogue will change to show a description of the activity and support links.
We are going to start by adding a Resource - so click on the resource section and start by choosing a file to add to your course.
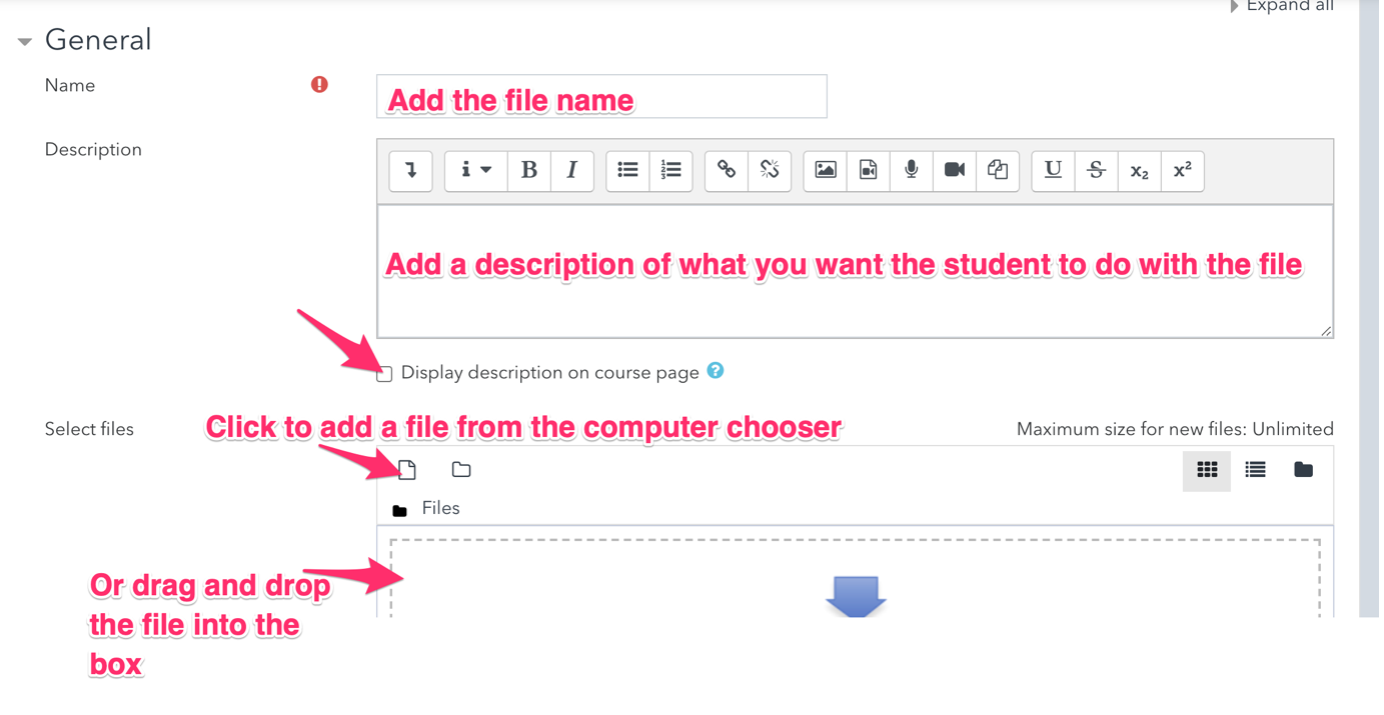
Step 5: Clicking File takes you through to the following screen. You will need to:
- Add the file name
- Add a description of what you want the student to do with the file
- Select the box that displays the description on course page
- And then add your file either by clicking on the page symbol or by dragging and dropping from your computer.
NB You can only add one file at a time using this method, but you can repeat the method to add multiple files to a topic.
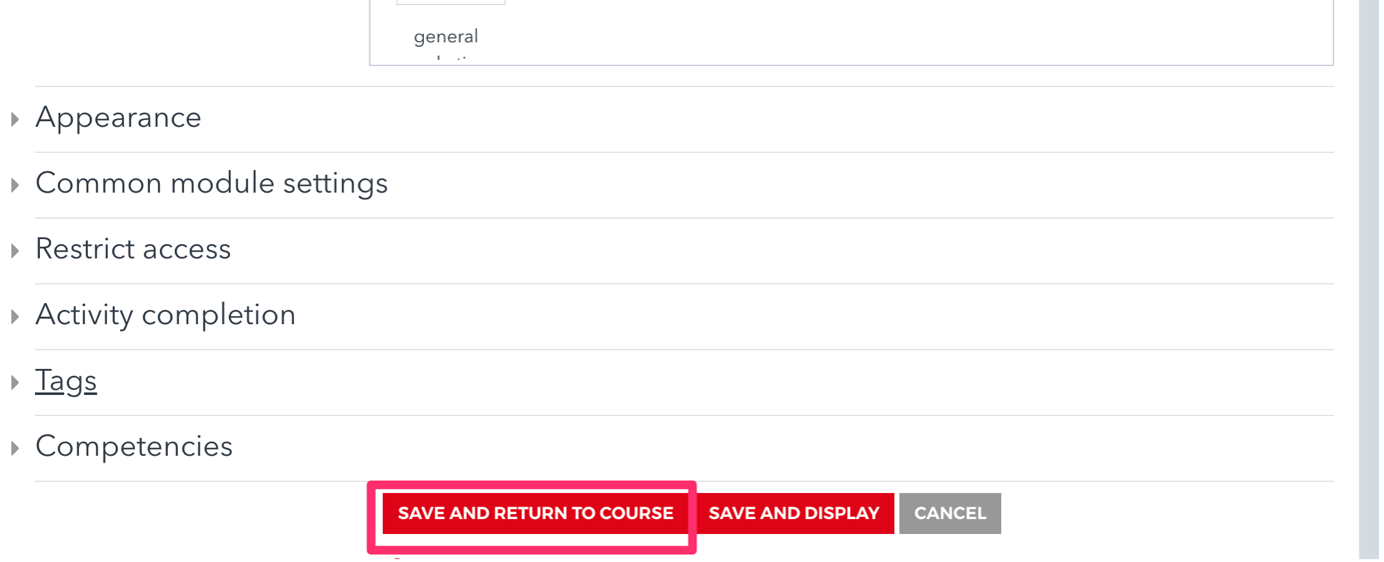
Step 6: Once you have filled in the different fields you will need to save the file by scrolling to the bottom of the page and clicking on Save and return to course and check its appearance on the page.
Note: If you wish to restrict access for certain time and dates you can do this through the activity completion tab. You can set up activities so that students must complete them by a certain date. You can also organise your courses so that students can only complete activities once they have completed previous activities. So for example they can only do the Second Conditional exercise once they have completed your First Conditional exercise and you can set a minimum level of attainment as well if you wish.